Jennifer Gregson

Young Adult Indie Author

Menu
  • Home
Menu

Category: Books

book formatting terms for self-publishing authors

Book Formatting Terms Every Indie Author Should Know: Lingo 101 for Self-Publishing

Posted on July 18, 2025July 18, 2025 by Jennifer Gregson

Have you ever been in a Facebook group or emailing your formatter when they casually drop terms like “trim size,” “bleed,” or “widows,” and you just sit there blinking at your screen, wondering if you missed an entire course on publishing jargon?

You’re not alone.

Because here’s the deal: every industry has its own lingo, and publishing is no different. Writers spend years learning about character arcs and three-act structures, but when it comes to book formatting? It can feel like a whole new language.

Let’s change that. Welcome to Formatting Lingo 101!

1. Trim Size (No, It’s Not About Haircuts)

Trim size is the physical size of your printed book. It’s measured in inches (in the U.S.) and it’s one of the very first decisions you need to make before formatting your print book.

Common trim sizes include:

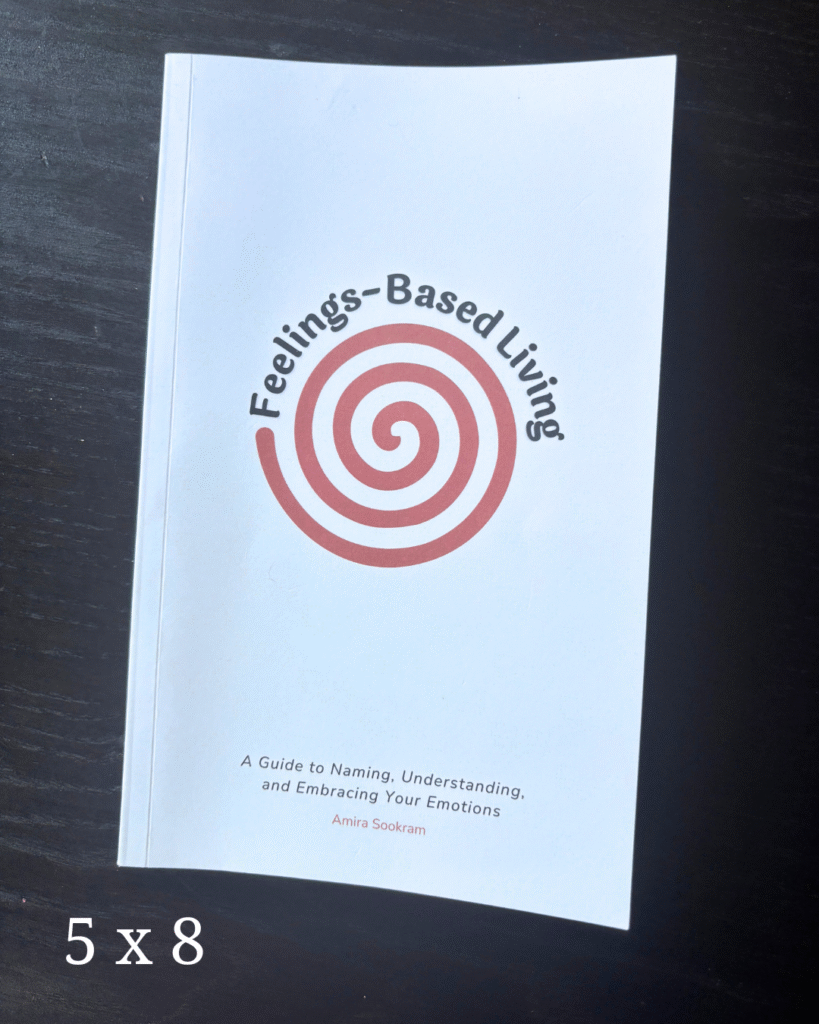
  • 5″ x 8″ – Great for small paperbacks, especially fiction
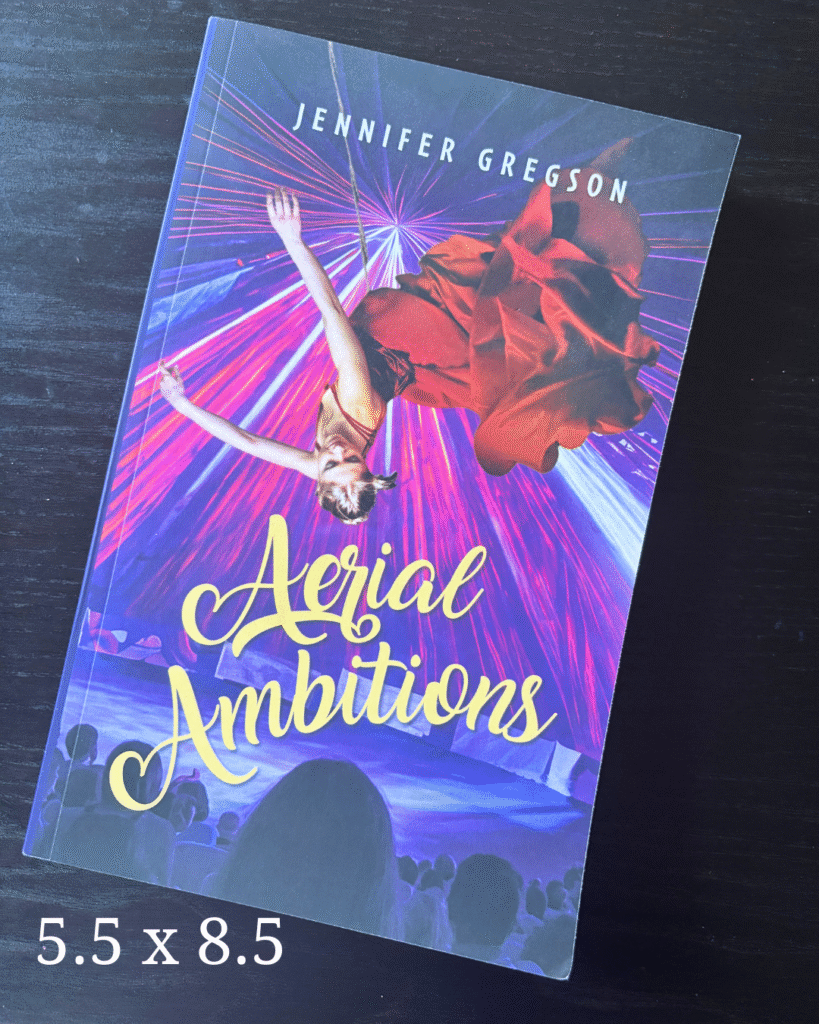
  • 5.5″ x 8.5″ – A slightly roomier version
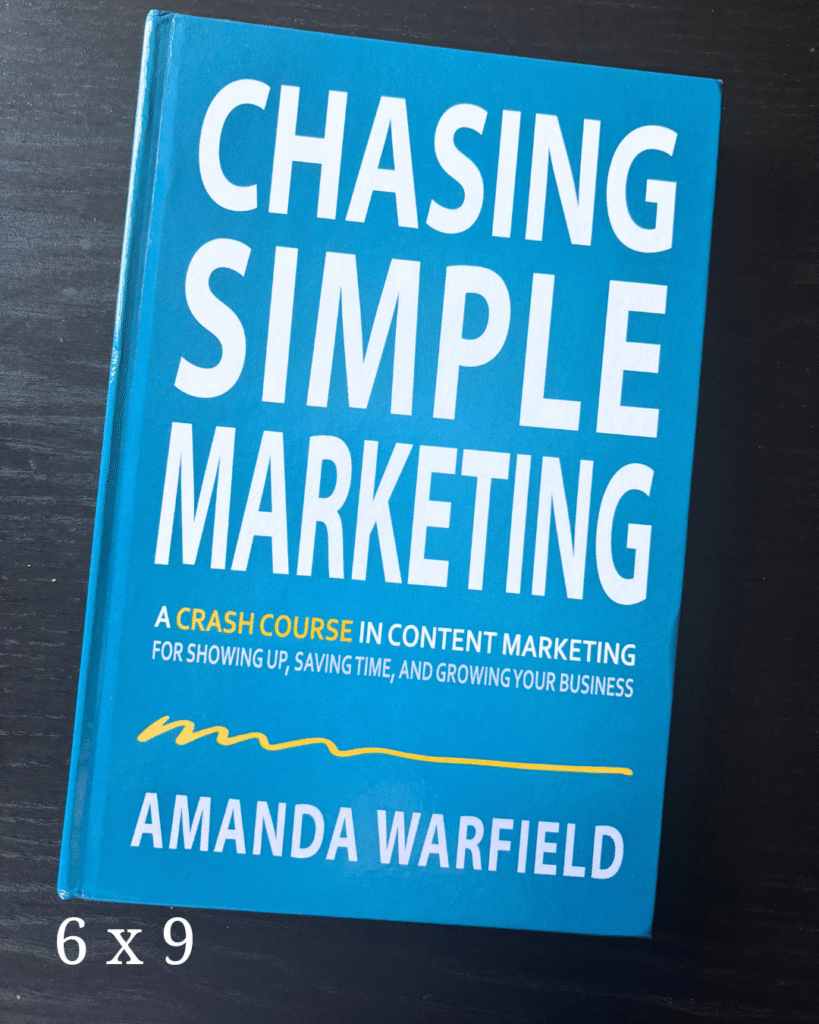
  • 6″ x 9″ – Often used for nonfiction and trade paperbacks

Each trim size gives your book a different feel, and it can even impact page count and printing costs. Want a deep dive on choosing the right one? You can read my blog post about that topic HERE.

👉 Why it matters: Your trim size determines how your book fits on shelves, what readers expect, and how your interior layout looks. Choose this before formatting anything.

2. Bleed (Not As Scary As It Sounds)

Despite the dramatic name, bleed has nothing to do with injuries. In publishing, bleed refers to the extra space around images or colored backgrounds that extends beyond the trim size.

If you’re printing an image that goes all the way to the edge of the page, you need bleed to make sure the printer doesn’t leave a white border. Most formatting programs will ask you if your file has bleed, and it affects how your PDF is exported.

👉 Why it matters: If you’re including full-page images or design elements that reach the edge, always account for bleed in your design and formatting files.

3. Margins (The Quiet MVPs)

Margins are the blank spaces around your text. In digital formatting, they make your book readable. In print, they’re even more important—especially the inner margin (also called the gutter) that runs down the center when you open the book.

You want enough space so your text isn’t swallowed by the spine.

👉 Why it matters: Too-small margins make your book hard to read and may get your file rejected by distributors like KDP or IngramSpark.

4. Front Matter and Back Matter (The Bookends of Your Book)

These might sound familiar, especially if you’ve read my previous blog posts on front and back matter, but they’re worth repeating.

  • Front Matter: Everything that comes before Chapter One—title page, copyright, dedication, table of contents, etc.
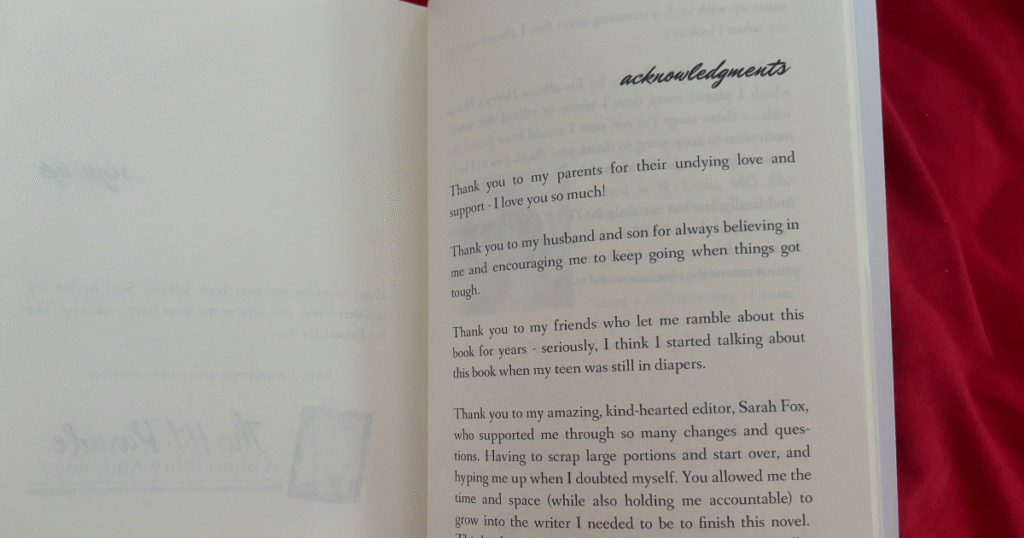
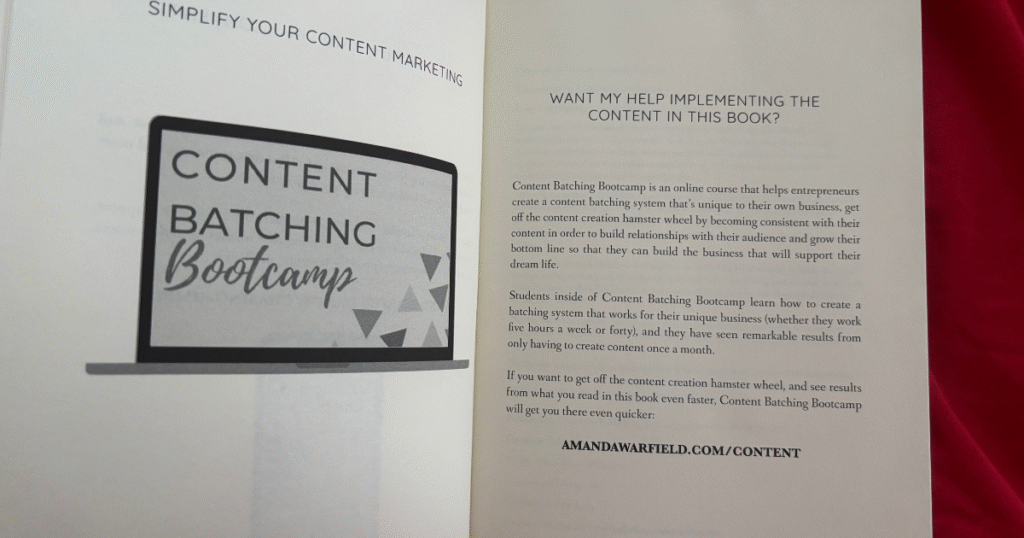
  • Back Matter: Everything after “The End”—about the author, acknowledgments, teaser for the next book, and links to your other work.

👉 Why it matters: These sections set the tone (and future sales potential) of your book.

5. Headers, aka Running Heads

Headers (sometimes called running heads) are the small lines of text at the top of each page. They usually contain the book title, author name, or chapter title.

In fiction, it’s often:

  • Odd pages: Author Name
  • Even pages: Book Title

In nonfiction, you might use chapter titles instead to help readers navigate.

👉 Why it matters: Headers create a polished, professional look and improve usability—especially for nonfiction readers who jump around.

6. Widows and Orphans (Don’t Worry, We’re Still Talking About Books)

In publishing lingo:

  • A widow is a single word or very short line at the end of a paragraph that appears at the top of a new page.
  • An orphan is a similar lonely bit of text left stranded at the bottom of a page.

It’s visually awkward and disrupts the reading flow. Formatting software can sometimes automatically fix these, but you’ll want to check your layout manually, especially in print.

👉 Why it matters: Leaving a single word dangling on a new page just looks… off. It’s a small detail that makes a big difference in professionalism.

7. Embedded Fonts

If you want your book to use a specific font—especially a custom one—you’ll need to make sure it’s an embedded font.

Embedded means the font is included in your exported file so that it displays correctly across devices and when printed. Some free fonts (like Google Fonts) are embeddable. Others, especially ones you purchase, may have licensing restrictions.

Formatting software like Atticus, Vellum, and even Canva often include licensed fonts you can safely use. But if you’re uploading your own, double-check that it’s embeddable.

👉 Why it matters: Without embedding, your fancy fonts might not show up correctly on an eReader—or worse, get your file rejected by retailers.

8. File Formats (EPUB, PDF, and Goodbye, MOBI)

Different file formats serve different purposes:

  • EPUB: The standard format for eBooks. Used by most retailers including Apple, Kobo, and Barnes & Noble.
  • PDF: Required for print files like paperbacks and hardcovers. It preserves layout exactly.
  • MOBI: Used to be Amazon’s format, but is being phased out. Most of the time now, Amazon accepts EPUB files too.

👉 Why it matters: Always check which file type your publishing platform requires. Formatting for print vs. eBook is not the same.

9. Ask the Questions (Seriously, We Don’t Mind!)

One last, very important term: Ask.

Okay, not a formatting term, but hear me out.

If your formatter or publishing software throws out a word or phrase you don’t know, ask. There are no dumb questions here. Every formatter—myself included—has gotten so used to this vocabulary that we sometimes forget not everyone lives in formatting land.

So whether you’re DIY-ing your book interior or hiring a pro, speak up. Ask what a term means. Google it. Or hey, drop a comment or DM me and I’ll explain.

👉 Why it matters: Your book. Your name on the cover. You deserve to understand what’s happening during every step of the publishing process.


Feeling overwhelmed? No worries—I’ve got a free formatting checklist just for you! This guide walks you through everything from front matter to final file formats, and it’s perfect whether you’re doing it yourself or working with a formatter.

👉 Download the Formatting Checklist Here

Grab your free Indie Author Formatting Checklist here

Final Thoughts: You’ve Got This

Book formatting lingo might feel intimidating at first, but once you understand a few key terms, it becomes much easier to communicate with your formatter, pick the right software, and feel in control of your publishing process.

And remember: You don’t have to learn it all at once. Bookmark this post. Save it for later. Come back to it every time you need a quick refresher.

Got questions? Drop them in the comments or send me a message—I’ll answer directly or maybe even turn your question into a future video or blog post.

Happy formatting—and even happier writing!

what to include in the back matter of a self-published book

Don’t Leave Your Reader Hanging: What to Include in the Back Matter of Your Self-Published Book

Posted on July 18, 2025July 18, 2025 by Jennifer Gregson

So, your story’s over. You typed “The End,” closed your laptop with a flourish, and maybe even did a happy dance in your kitchen. But hold up — your book isn’t quite done yet.

There’s a little section often overlooked but packed with potential: the back matter. And if you’re an indie author, this part of your book is more than just a place to say thanks—it’s prime real estate for building reader relationships, teasing future books, and even getting more sales.

The back matter is everything that comes after your story ends. Unlike front matter (which includes required bits like your copyright notice), the back matter is optional—but oh-so-powerful. Think of it like the dessert at the end of a good meal. You could technically skip it, but… why would you want to?

Acknowledgments: Your Mini Oscar Moment

Let’s start with the feel-good stuff: acknowledgments.

This is where you shout out your beta readers, critique partners, editor, cover designer, and of course, your family and friends who cheered you on through every word. Think of it as your own little Oscar acceptance speech—no fancy gown required.

Tip: Keep it warm and personal. Readers love seeing the human behind the pages.

About the Author: Introduce Yourself (Again)

If you didn’t include your author bio in the front matter, this is the place to do it. And even if you did, it’s totally fine to include a slightly more relaxed or personalized version in the back.

Include a current headshot and a short or medium-length bio. You can keep it consistent across all your books or tailor it a bit to match the tone or themes of the one they just finished.

For example, in my novel Etta and Gina, which is set in my hometown of St. Louis, I mentioned how writing the book helped me reconnect with the foods and feelings of my childhood. That little personal touch goes a long way in making readers feel like they know you.

Ask for the Review (Nicely!)

Readers who make it to the end of your book? They like you. So don’t be shy—ask for a review!

You can phrase it warmly, like:

“If you enjoyed this book, I’d love it if you left a quick review—it helps other readers discover it!”

Include a universal review link or use smart links that send them back to the store where they purchased the book (Amazon, Apple Books, Kobo, etc.). Some professional formatting tools can even do that automagically.

Invite Them to Your Newsletter

Your back matter is an ideal place to invite readers to join your email newsletter. Why? Because they’re already invested in your story and your voice. Strike while the bookish iron is hot!

Let them know:

  • What they’ll get (freebie, bonus chapters, character art, etc.)
  • How often you email (weekly, monthly, just when there’s news)
  • Why they’ll love it

Bonus tip: Include a visual—like a mini banner or mockup of your freebie—to grab attention.

how to format the back matter of a book

Sneak Peek: Tease the Next Book in the Series

Got a sequel brewing? A series planned? A novella connected to the main character’s dog’s cousin? Now’s the time to tease it.

If you’ve already drafted Book Two, share the first chapter or even just a short teaser. Readers love feeling like insiders. You can even say:

“You’re one of the first to read this sneak peek!”

Then—this is important—follow it with a newsletter signup or a purchase link so they can stay in the loop or buy the next book immediately.

If your series is complete (first of all—go you!), go back and add the first chapter of the next book in each one. Yes, it’s a little extra work, but it keeps your readers binging your stories like it’s Netflix.

List of Other Books by You

This is especially helpful if you’ve got multiple books out. Don’t assume readers know about all of them!

Create a clean, organized “Also by” section that:

  • Groups books by series
  • Lists standalone titles
  • Includes purchase links (again, universal or store-specific)

This helps readers know where to go next and builds trust in your author brand.

indie author back matter checklist

Formatting Tips for a Polished Back Matter

Now, let’s talk layout. The way your back matter looks is just as important as what’s in it—especially for print.

Here are a few things to watch out for:

  • Headshot Sizing: Make sure your photo isn’t so large it bumps your bio onto a second page—unless that’s intentional.
  • Print Page Balance: In paperback formatting, odd pages are on the right. If your bio starts on the right and ends on the back (left), you might not like how that looks when the book is open.
  • Spacing and Style: Keep fonts and styling consistent with the rest of your book. You want your back matter to look just as professional as your cover and interior.

Pro tip: If you’re using Vellum, Atticus, or another pro-level formatting tool, use the preview option to double-check layout before uploading your files.


TL;DR: What to Include in the Back Matter of Your Book

Here’s a quick checklist of back matter ideas:

✅ Acknowledgments
✅ Author bio + photo
✅ Request for reviews (with a link!)
✅ Newsletter sign-up info
✅ Teaser or chapter from your next book
✅ “Also by” list of your other titles
✅ Social media or website links

Remember: You don’t have to include everything. Pick the pieces that serve your goals and your reader’s journey. And if you’re unsure, start small and build as you go.


Want More Help with Formatting?

Feeling overwhelmed? Don’t worry—I’ve got your back! 🎉

Download my free Indie Author Formatting Checklist where I walk you through both front and back matter (plus everything in between). It’s beginner-friendly, easy to follow, and available right here.

Grab your free Indie Author Formatting Checklist here

And if you missed my video on front matter, that’s a must-watch too—check it out HERE or on my YouTube channel.


The end of your story doesn’t have to be the end of the reader’s journey with you. By using your back matter strategically, you can:

  • Strengthen your author-reader relationship
  • Sell more books
  • Grow your newsletter
  • Build buzz for future releases

All while giving your book a polished, professional finish.

So next time you’re formatting your manuscript or working with a formatter (hi again 👋), give the back matter a little extra love. Your readers—and future self—will thank you.

Until next time, happy writing and keep being the indie author rock star you are!

💌 Got questions about formatting, front matter, or back matter? Drop them in the comments or send me a DM. I’d love to help!

Front Matter 101: What Every Self-Published Author Needs Before Chapter One

Posted on June 27, 2025 by Jennifer Gregson

If you’re not sure what goes before chapter one in your book—you’re not alone. The front matter is often an afterthought for indie authors, but it’s actually one of the most important parts of your book. It sets the tone for your reader and protects your rights as the author.

What Is Front Matter?

The front matter includes everything in your book that comes before the first chapter. For example:

✅ Copyright Page

This legally protects your book and establishes you as the copyright holder.
Include:

  • Your publishing date
  • Business name (if applicable)
  • ISBN (if you’ve purchased one)
  • Editor or designer credits (optional)
  • A clause about AI usage (optional but becoming more common)

Pro Tip: You can Google “indie author copyright page template” to find examples you can customize.

✅ Title Page

This is typically only included in paperback versions but can appear in eBooks too.
It may feature:

  • Just your title and author name
  • Your publisher logo (if applicable)
  • A grayscale version of your book cover

✅ Dedication Page (Optional)

If you’re dedicating your book to someone special—this is the place.
Some authors dedicate to family, friends, or in memory of loved ones.

✅ Table of Contents

Most formatting software will auto-generate this for you.

  • In eBooks: It’s clickable for easy navigation
  • In print books: It’s a visual table to guide the reader

For nonfiction books, consider whether to include subheadings to improve structure.

✅ Introduction, Epigraph, or Foreword

This is especially useful in nonfiction. These elements offer background, context, or inspiration.

✅ Optional: Newsletter Sign-Up Page

Some authors include a newsletter call-to-action here to take advantage of the “Look Inside” preview on bookstore sites.
You can also save this for the back matter (my personal preference) so that only readers who finish the book are prompted to sign up.


Front matter might seem small, but it plays a big role in how readers (and retailers) view your book. The more polished and professional it looks, the more confident your audience will be when they hit “Buy Now.”

Need help organizing all of this?

🎁 Grab my FREE Self-Publishing Formatting Checklist — it walks you through every element you need to prepare for formatting, including the front and back matter.

👉 Click here to download it now!

Grab your free Indie Author Formatting Checklist here

What Do You Include in Your Front Matter? Drop a comment and share your favorite front matter elements. Do you put your author bio up front? Ask for newsletter sign-ups right away? I’d love to hear what works for you.

best trim size for self-published print books

How to Pick the Perfect Trim Size for Your Print Book (with Examples!)

Posted on June 20, 2025June 20, 2025 by Jennifer Gregson

When you hear the word “trim size,” your first thought might be…a haircut? But in the world of self-publishing, trim size refers to the dimensions of your book—and it’s one of the most important decisions you’ll make when preparing your print edition.

📏 What is Trim Size?

Trim size is the final size of your printed book after it’s been trimmed during the binding process. It affects how your book feels in the reader’s hands, how it looks on the shelf, how many pages it has—and yes, even how much it costs to print.

Choosing your trim size early in the formatting process is key. It impacts the design, the page count, and even how your book will be priced through print-on-demand platforms.

📚 The 3 Most Popular Trim Sizes (with Examples)

Here are the most common trim sizes for fiction and nonfiction books:

5” x 8”

Often referred to as a “pocket-size” novel. This trim size is great for:

  • Middle grade and early YA fiction
  • Nonfiction books under ~70,000 words
  • Cozy genres that benefit from a smaller, more portable format

It fits nicely in bags and feels “just right” for shorter, focused reads.

5.5” x 8.5”

This is my personal favorite—and the size I use for all of my YA novels.

It’s:

  • Perfect for young adult, women’s fiction, and general contemporary books
  • Visually pleasing with more room on the back cover for your blurb
  • A middle-of-the-road option for page count and cost

If you’re unsure, check the trim size of your favorite books in your genre—it’s likely many of them use this size.

6” x 9”

A popular choice for:

  • Memoirs
  • Nonfiction with charts, diagrams, or room for note-taking
  • Fantasy or sci-fi novels that tend to run longer

This size is also ideal for hardcover versions of your book—it gives you space and a polished, professional feel.

🎨 Consider Genre & Aesthetic

Different genres often lean toward different trim sizes. Do a bit of research:

  • Visit your local bookstore and check what size books in your category use
  • Measure books you already own and love
  • Think about how you want readers to experience your book—is it cozy and portable or bold and immersive?

Also consider series consistency: if you’re planning a multi-book series, you probably want all the books to match on your shelf. Readers do notice!

💸 Trim Size Affects Cost

Print-on-demand pricing varies depending on trim size and page count. Larger trim sizes can increase printing costs—especially if you’re publishing in both paperback and hardcover.

For example:

  • A smaller book (like 5×8) typically costs less to produce
  • A larger trim size (like 6×9) may cost more but allow fewer total pages, which can balance the pricing

Always check the print pricing tools on Amazon KDP, IngramSpark, or your preferred POD platform before finalizing your choice.

✍️ When Should You Decide on Trim Size?

You don’t need to think about this during your first draft—but once you’re preparing for formatting (whether DIY or hiring help), trim size needs to be locked in. It affects layout templates, page setup, and even design choices.

🤔 What Trim Size Should You Choose?

Ask yourself:

  • What’s common in my genre?
  • How long is my book?
  • Do I want my series to have a uniform look?
  • What aesthetic am I going for?

I write YA coming-of-age fiction and use 5.5 x 8.5, but my upcoming urban fantasy might push me toward 6 x 9 for those longer word counts. I’ll decide once I’m closer to formatting!


📣 Let’s Chat

What trim size are you using? What genre do you write in? Have you found any surprising favorites while researching?

Drop a comment or send me a message! And if you’re stuck choosing or can’t find the info you need, I’d be happy to help.

Grab your free Indie Author Formatting Checklist here
book formatting timeline for self-publishing authors

When to Format Your Book: A Self-Publishing Launch Plan Timeline for Indie Authors

Posted on May 23, 2025 by Jennifer Gregson

Formatting your book is one of the final steps before publishing—but if you wait too long, you could find yourself scrambling at the last minute. Let’s talk about when to schedule book formatting in your launch timeline so you can publish without panic.


📚 You Typed “The End.” Now What?

You’ve edited your book, survived beta readers, and you’re almost ready to upload to your favorite bookstores. But suddenly, your to-do list explodes:

  • Write your book blurb
  • Finalize your cover design
  • Plan your launch
  • And yes—format your book files

It’s a lot. So when exactly should formatting happen in your launch plan?


🕓 Book Formatting Happens Last—But Plan Ahead

While your book is with your editor, you can get a head start on your blurb, cover design, and marketing. But formatting can’t happen until your final edits are complete. It’s one of the last pieces of the publishing puzzle.

⏳ How Much Time Should You Allow for Formatting?

If this is your first book—or the first time using formatting software—give yourself at least 3 weeks. Formatting involves more than just uploading a Word doc and hitting export. You’ll need time to:

  • Choose fonts and font sizes
  • Decide on trim size for paperbacks
  • Prep any images (maps, graphs, charts)
  • Troubleshoot tech issues
  • Learn your software or work with a formatter

And that’s assuming everything else is ready to go!


🛠️ What You Need Before You Format

Before you (or your formatter) can dive into layout, here’s what you’ll need:

✅ Your final manuscript

✅ A finalized cover (at least the eBook version)

✅ All images in PNG, JPG, or TIFF format

✅ A decision on print vs. eBook—or both

If you’re planning to offer a paperback version, you’ll also need to go back and forth with your cover designer. Trim size and page count directly affect the print cover’s spine width, so factor in a buffer for those revisions.


🎁 Planning for ARCs? Format Early!

If you’re sending your book to early readers, launch team members, or ARC reviewers, don’t wait to format. You want those advanced copies to look clean, professional, and polished—not like a draft.


✅ TL;DR: Book Formatting Timeline Recap

  1. Finish edits
  2. Finalize your cover (at least the eBook version)
  3. Prep images and make formatting decisions
  4. Schedule 3 weeks for formatting (especially if you’re DIY-ing)
  5. Allow time for back-and-forth if working with a designer or formatter
  6. Format early if you’re sending ARCs


😩 Feeling Overwhelmed?

You are not alone. Formatting can be technical, confusing, and time-consuming—which is why I created a free Indie Author Formatting Checklist to guide you through it step-by-step. Download it now and avoid last-minute stress.

👉 Grab the checklist here!

Grab your free Indie Author Formatting Checklist here

💬 Let’s Connect!

I post new tips every week on my YouTube channel, where I cover formatting advice, launch planning, and indie author life. Subscribe and come hang out with me!

Why Book Reviews Matter: How Leaving a Quick Review Helps Your Favorite Indie Author (and Other Readers!)

Posted on March 21, 2025March 21, 2025 by Jennifer Gregson

Have you ever finished reading a book, flipped to the end, and spotted a little note that says something like, “If you loved this book, please leave a review!”? Maybe you’ve seen it and thought, Eh, does it really make a difference? Spoiler alert: YES, it does—more than you probably think! Today, I want to break down exactly why authors (especially indie authors like me!) ask for reviews and how your short, sweet thoughts can make a BIG impact.

1. Reviews Help Our Books Get Seen

The world runs on algorithms—whether you’re scrolling on Amazon, Barnes & Noble, or Kobo. The more reviews a book has, the more likely the platform is to recommend it to new readers. Yep, even short reviews count! You’ve probably seen those “Readers Also Bought” sections—those are prime spots fueled by reviews. Your review could be the reason a new reader discovers their next favorite book (and mine!).

2. Reviews Help Other Readers Make Decisions

Think about it—how many times have you peeked at reviews before spending your gift card or hard-earned cash? Reviews are like word-of-mouth recommendations in digital form. They help readers decide if the book is worth their time, if it has the kind of plot or character they love, or if it’s a total page-turner. So even if it’s just one sentence, your thoughts matter.

3. Honest, Constructive Reviews Help Authors Grow

Here’s a little behind-the-scenes secret: we actually want your honest opinions. Did the twist not surprise you? Was the character a little flat? Sharing that (kindly!) helps us improve future books, especially if we’re writing a series. Constructive feedback = better books for you in the long run.

4. Reviews Create Promo Magic

Lastly, reviews are a marketing goldmine! I use quotes from reviews in my newsletters, on Instagram, and everywhere else to spread the word. So your review isn’t just for the store—it’s a tool that helps me reach more readers all over the internet.

How to Leave a Quick & Helpful Review

It doesn’t need to be a novel (pun intended)! Here are some super simple review starters:

  • “I loved this book. The main character’s problem felt so real!”
  • “Couldn’t put this down—the twist totally surprised me.”
  • “Such a fun read! Can’t wait for the next book.”

Short, sweet, and seriously helpful.

Ready to help your favorite authors?
Next time you finish a book you enjoyed—even if it’s just a mild like—consider leaving a review. It’s one of the easiest, most supportive things you can do for indie authors (and fellow readers). If you’ve read my latest Young Adult novel, Aerial Ambitions, I would really appreciate you leaving me a review today. Thanks!!

The Inspiration Behind Aerial Ambitions: Circus Dreams, Grief, and Harry Styles

Posted on February 28, 2025February 28, 2025 by Jennifer Gregson

Every book has a story behind the story, and today, I want to share what inspired my third young adult novel, Aerial Ambitions. This book was on my heart for years before I had the chance to sit down and write it, and some of the inspiration behind it was expected—while one source completely surprised me!

A Love for the Circus

One of the biggest inspirations for Aerial Ambitions was, of course, the circus. My main character, Roz, comes from a family of traveling performers, but she leaves that small world behind to join a grand three-ring circus in Chicago.

My love for the circus started early. Growing up in St. Louis, my dad had a lot of friends who were Shriners, and every year, we’d go to the Shriners Circus. I was captivated by the spectacle, the daring stunts, and the larger-than-life performances. My brother was even part of a local circus when we were kids, and I still remember my mom helping him put on his clown makeup.

At one point, I auditioned to be the ringmaster at my performing arts elementary school, though I changed schools before I could actually do it. But the idea of commanding the center of the ring stuck with me, and it eventually found its way into Aerial Ambitions.

Personal Loss and Grief

While the circus theme was a fun and exciting part of the story, Aerial Ambitions also has deep emotional layers. From the beginning, I knew that Razi’s older brother would die—a pivotal event that shapes her journey. Originally, I wrote the scene where he dies attempting a dangerous motorcycle stunt, but in the final version, his death happens before the book even begins.

Though I haven’t lost a sibling to a fiery motorcycle accident, I have lost two siblings to cancer. Writing about grief in this novel meant pulling from my own experiences, using those emotions to make Roz’s pain and resilience feel real. She also lost her mother at a young age—something I haven’t experienced personally, but I channeled my own losses into her story.

A Love for the Spotlight

Beyond the circus itself, Roz’s desire to perform and chase the spotlight mirrors my own past. I have a degree in theater and spent years auditioning for Broadway and regional productions. While I never reached the heights of my Broadway dreams, I’ve always loved being on stage, performing, and captivating an audience.

That craving for the spotlight is a major driving force for Roz. She wants to see her name in lights above the circus tent, to be remembered as a legendary performer. To write her character, I pulled from my own memories—learning monologues, dreaming about seeing my name on a marquee, and the thrill of applause.

A Surprise Inspiration: Harry Styles

Now, for the unexpected source of inspiration—Harry’s House, the album by Harry Styles.

For some reason, that album became my writing soundtrack. I played it every single time I sat down to write or edit Aerial Ambitions, and now, whenever I hear a song from it, I immediately feel the urge to write. It’s like Pavlov’s dog, but for creativity!

I even thanked Harry Styles in the acknowledgments of my book because I truly don’t think I would have made it through the writing process without his music. If anyone out there knows him, let him know I’d gladly send him a copy!

Finding Your Own Inspiration

Writing a book isn’t always easy, and sometimes, the inspiration to keep going comes from unexpected places. For Aerial Ambitions, I drew from childhood memories, personal loss, and my theater background—but also from a pop album that just happened to click with my creative brain.

If you want to check out Aerial Ambitions, you can read the first three chapters for free when you join my newsletter or grab a copy on Amazon (available in Kindle Unlimited, ebook, and paperback).

What’s the strangest thing that has ever inspired you? Let me know in the comments—I’d love to hear your stories!

How To World Build Real “Fictional” Places

Posted on March 22, 2022March 22, 2022 by Jennifer Gregson

When most writers think of world building they start thinking about space odyssey, fantasy realms, or worlds with lots of magic but I’m here to tell you that it’s just as important when building out real “fictional” places to help ground your readers into the reality of your story.


What is World Building?


It’s setting the stage for my characters, the actors, to play upon. This can mean anything and everything from their house, the city they live in, to far off magical lands. The Young Adult books I write happen in real places – my first novel, The Art of Lying, is set in New York City. The book that’s coming out this summer is set in my hometown of St. Louise and my 3rd novel is set in the Circus. Now it’s not a real circus, but circuses are real things – so I think it counts.


To make sure these places ring true for your readers, you need to think of three things: Key Landmarks, Elementals and Character Interactions.


Key Landmarks


For this category, think about things like places – buildings, parks, homes; food – local specialties, likes and dislikes of the characters; proximity from one place to another – do your characters have to travel, do they walk everywhere?


To help you decide on these key landmarks, go to the characters themselves.  What’s most important to them? Do they need coffee in the morning to get going? Do they have a specific route they take to work or school? Then think about your story, what main problem does your story need to have? What would help or hinder the conflict? 


Once you have these key landmarks – you will need to use maps, pictures, interviews, or actually going there and doing real life research to help you get the small details right, which will go a long way to help with your setting and world building as a whole. 


Elementals


What year or time period is your book set? Present day, 1980’s, Colonial times, the future? What country does your book take place in? Things are going to be different in Ireland versus the United States, for example.  


Real “fictional” places can also be historical places, or setting your book in the future, but in a real life city, so make sure you keep these places and times in mind. 


What season are you in? It’s going to make a difference especially if your character spends time outside or needs to take public transportation, or is driving through the desert, or dealing with a climate change – like snow in Las Vegas (it happens, but it’s super weird). 


Remember, to keep your plot points in mind as well – when do things have to happen? For example, my 2nd book has the characters trying out for the high school varsity baseball team and trying out for the Spring musical – those need to happen at a certain point in the school year. 


Character Interactions 


How does your character interact with the setting? For example, if your character lives in the suburbs of St. Louis they are going to need access to a car, but if they are too young to drive what are they going to do? Bum rides off their older siblings, have to deal with car pools and their parents, or walk home? 


My suggestion at this point would be to interview your characters and find out how they feel about where they live – do they love where they are? Do they hate it and can’t wait to move as soon as they can? Do they love the setting, but hate the weather? What does your character think about the setting you’ve placed them and how does that help or hinder your story?


As you can see, world building is a totally different thing if you are writing a fantasy world or something up in space where you are in complete control of the setting – you have a lot more options and maybe more creativity, but it’s just as important when you’re writing about real places and real settings to get those specific details right – even if it’s just a small thing like how the park smells or how the food tastes, it really helps ground your reader into the reality of your book and helps them focus on the story and the characters. 


Let me know below one tiny detail you will be adding to your real world building in the comments below!!

The form you have selected does not exist.

Mix & Match A Customized Writing Ritual Built Just For You

Posted on February 22, 2022March 22, 2022 by Jennifer Gregson

Do you have a writing ritual that helps you put more words on the paper? Would you like one that’s totally customized just for you? 


I believe that having a writing ritual can help you actually look forward to writing so you sit down day after day with a smile on your face.  This is how I wrote the first draft of my third novel in 4 months (which is fast for me!) – by having a writing ritual that I could not only customize for me and my likes, but also how I felt each day.


There are four categories that I think make up the perfect writing ritual, read through and choose 1-2 items from each to start building out your customized ritual.  


CATEGORY ONE: GROUNDING

You want to come into your writing space, or writing project as clear as possible.  Back in my college theater days we had something called “leave your baggage at the door” where you would visualize all the stuff from your day – the fight with your roommate, the bad grade on the test – as baggage that you would drop at the door of the theater rehearsal or performance space.  The thing is this concept has been extremely helpful as a writer as well. You forget the fight, the bills or dishes piling up, and leave that baggage at the door so you can concentrate on your story.


This is how I ground, but there are other things you can do.  Deep breathing, meditation, feel your feet on the floor (or your butt in the chair) – anything that helps YOU be in the present moment so you can write without distraction or worry.  This needn’t take long, but will go a long way to give you peace of mind so you can enter your creative world. 


CATEGORY TWO: EXCITEMENT

This category is all about hyping you up so you are in a good mood to write.  I like to use music, either a particular song or genre.  Another thing I like to do is choose a Tarot card and do some light free writing. Some people read from their pervious writing sessions, dance it out, or light a candle.  Think of something that will amp you up so you have the energy to write for that day’s session.  This is where the customization can really come into play – what kind of energy boost do you need that day? Song and dance, a candle and three deep breaths, or will quickly reading the last line you wrote get you ready to start typing up new words? 


CATEGORY THREE: MOTIVATION

Okay, so you are in the present movement and you are hyped up, now you need to keep that motivation high to write for your session.  Personally, I continue using music but others have told me they love having a mood board to look at, character sheets with images, a favorite snack they can nibble on, or a timer they can try to “beat”.  Some people need complete silence and that’s great too, I suggest trying a few to see what works best for you most days. 


CATEGORY FOUR: REWARD

When your session is over you might feel like you are in a haze of creative energy.  For that I suggest a re-entry type exercise that can help you come back into the real world.  It can either mirror what you did at the beginning to ground – so pick the baggage back up, feel your feet on the floor, or do a quick meditation – or use some other technique like closing your project or laptop or just checking off that day’s session on a calendar.


Once you are back into the real world, you need to reward yourself for a job well done – I don’t care if you wrote two words or two thousand words, you deserve a reward.  Give yourself a gold star sticker, a piece of chocolate, a dance party, or 30 minutes to watch your favorite show.  You earned it!!


Now that you have a few items that you can choose from for each category, I want to ask you to look over your list and make sure at least one item each day is going to light you up, something that’s so fun you can’t wait to do it.  For me, this is music – it lights me up, keeps me motivated and makes me super happy.  What is that element for you? 


I would love to know what your current writing ritual is and what you might be adding now that you’ve read this article – what were you missing? What will definitely light you up so you can come back to the page (and the chair) day after day so you can finally type The End on your novel?


The form you have selected does not exist.

2020…What a Year!

Posted on December 14, 2020November 21, 2020 by Jennifer Gregson

Wow, 2020…you have definitely been a year.  Would I say a good year?  Probably not, but was it a total wash? Nope, not really.  Let’s take a little look back at some of my favorite writing posts from this year and you tell me down below in the comments, which was your favorite?

I started the year off with a few of my favorite things when I write – coffee, notebooks, and music, oh my!

A Few Of My Favorite Things…When I Write

I showed how I get into the head of a character and do my various journaling techniques for finding voice.

How To Get Into The Head Of A Character

Then I shared my author journey from NaNoWriMo to Self-Published Writer!

My Author Journey: How I Went From “Oohhh NaNoWriMo Sounds Fun” To “Self-Published Author”

I shared an interview I did with the two main characters of my upcoming YA novel.

An Interview With Etta And Gina

Oooh, I tried to explain why I love writing YA Coming of Age novels — I really, really do — they are the best!

Why I Write Coming Of Age Stories for Young Adults

After quarantine craziness, I talked about how I’m making my writing more fun!

How I’m Making Writing More Fun

I showed how I use Pinterest to create a mood board for my books – with character images, pictures from the novel’s setting, and other things that remind me of my book as I’m writing.

How I Use Pinterest To Create Mood Boards For My Novels

Lastly, I shared a series of how I use Tarot in my writing by creating characters, making an outline, and working through the muddy middle.

Using Tarot Cards (And My Own Spreads) To Write A Short Story

2020 was rough, but I’m actually proud of all I’ve accomplished.  Tell me below, what good things have come out of 2020 for you? 

I hope everyone has a good year end and I’ll see you in 2021!!!

The form you have selected does not exist.

  • 1
  • 2
  • 3
  • Next
  • July 25, 2025 by Jennifer Gregson How to Use Headings and Flourishes in Book Formatting: A Fun Guide for Indie Authors
  • July 18, 2025 by Jennifer Gregson Book Formatting Terms Every Indie Author Should Know: Lingo 101 for Self-Publishing
  • July 18, 2025 by Jennifer Gregson Don’t Leave Your Reader Hanging: What to Include in the Back Matter of Your Self-Published Book
  • June 27, 2025 by Jennifer Gregson Front Matter 101: What Every Self-Published Author Needs Before Chapter One
  • June 20, 2025 by Jennifer Gregson How to Pick the Perfect Trim Size for Your Print Book (with Examples!)
© 2026 Jennifer Gregson | Powered by Minimalist Blog WordPress Theme